Showing posts with label Recipes. Show all posts

Monday, November 8, 2010

Butternut Squash Kugel

One of the many reasons I love twitter is the group of women I've met through a mutually shared ... umm ... errr ... love-hate relationship with Twilight. Mr. O would probably say otherwise but I can really only discuss Twilight for so many hours before I digress to other topics. Usually the discussion turns to our kids, husbands, jobs and the crazy guy on the metro.

In the case of today's recipe it was a "whatcha cookin tonight" chat. I have two lovely, sweet and funny as hell fellow mom friends who educate me on a whole host of things including their faith, Judaism and some of their traditions. Lets call them Mrs. R and Mrs. Z, they are always around to answer questions and make me laugh. So when they both suggested making a kugel as a side dish I was more than a bit confused. I thought kugel was a dessert, turns out I was thinking of ruglua. Who knew? Okay, apparently a lot of people know the difference. {blushing}

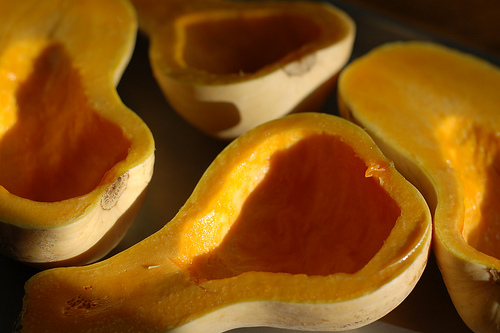
Our farmers market is full of butternut and acorn squash this time of year so after playing around with a few recipes I came up with a butternut squash kugel that was a huge hit with my boys. Both Mr. O and Little Mister were fans, as was Baby Deux but to be fair he'll eat anything and when I say "eat" I really mean "gobble up with the enthusiasm of a man starving."

This works as a great seasonal side dish and the mild flavor would go well with turkey!

Happy Fall Baking!

Butternut Squash Kugel
Serves 6 as a side


1 lbs butternut squash, roasted and chopped
1/3 C butter
2/3 C all-purpose flour
2 eggs
1/2 C sugar
1/3 C 2% milk (plus extra as needed)
1 tsp vanilla extract
ground cinnamon, for dusting
*Optional 6 oz. No Yolk noodles


Pre-heat oven to 350 degrees


Mash together the butter and butternut squash in a large bowl. Whisk together the flour, eggs, sugar, milk and vanilla extract in a separate bowl. Stir flour mixture into the butternut squash (and the egg noodles if using).


Spread mixture into a baking dish and sprinkle top with cinnamon. Bake until golden brown for about one hour.

Cheers, 
Ouiser

Sunday, October 31, 2010

Happy Halloween ~ Ms. Paula's Pumpkin Gooey Butter Cakes

Just a quick note to say Happy Halloween! Sorry I've been a bit bloggy delinquent recently. I've been on domestic goddess overload of late. Traveling and baking and preparing birthdays and parties and family visits. But I've got a few things "in the oven" for you so keep your knickers on!

Hoping yall have a spooking scary day filled with grinning goblins and merry monsters! To keep with the theme of the day here's one of my all time favorite recipes from the Queen of Butter, the Dame of the Georgia Drawl .... Ms. Paula Deen! 

All joking aside I'm serious when I tell you these are super easy and I've yet to meet one person that doesn't love these. My advice... cut them small and serve with (home made) whipped cream. Heaven! 

Pumpkin Gooey Butter Cakes
Serves 8
Cake:
1 18 1/4-ounce package yellow cake mix
1 egg
8 tablespoons butter, melted

Filling:
1 15-ounce can of pumpkin
1 8-ounce package cream cheese, softened
3 eggs
1 teaspoon vanilla
8 tablespoons butter, melted
1 16-ounce box powdered sugar
1 teaspoon cinnamon
1 teaspoon nutmeg


Preheat oven to 350 degrees.
To make the cake, combine all of the ingredients and mix well.  Pat the mixture into a lightly greased 13x9-inch baking pan. 
Prepare filling: In a large bowl, beat the cream cheese and pumpkin until smooth.  Add the eggs, vanilla, and butter and beat together. Next, add the powdered sugar, cinnamon, nutmeg, and mix well.  Spread pumpkin mixture over cake batter and bake for 40 to 50 minutes.  Make sure not to over bake as the center should be a little gooey.
Serve with fresh whipped cream.

And I just have to do a quick plug for her website. I didn't even know she had a website till I started looking for the recipe but it's fabulous! Very easy to find what you're looking for and of course full of quirky sassy Paulaisms! Check it out ... www.pauladeen.com 

Cheers, 
Ouiser

Sunday, October 17, 2010

Cheddar Bacon Biscuits


I was browsing through the latest Williams Sonoma catalogue this week, dog-earing nearly every page with accompanying "Oooo I need that" or Mr. O's favorite, "I don't need that but its sooooo pretty."

I find each of their catalogues inspirational but there's just something extra special about this time of year that makes me want to bake and decorate... all the time. So, with that in mind when I mentioned how tasty the Cheddar Bacon Biscuits looked featured in the latest Williams Sonoma catalogue Mr. O jumped on it, suggesting I try them out.

This morning I made a batch and while I do have a few changes and suggestions, make no mistake. 

They. Are. Win.

I'm linking you to the Williams Sonoma recipe here but also detailing it below with my notes and suggestions. 

These are perfect for chilly fall weekend mornings. If you make a batch, by all means please let me know what you think!

Cheddar Bacon Biscuits
12-15 biscuits

6 oz. Bacon, diced (4 slices of thick cut bacon)
2 C All purpose flour
1 TBS Baking powder
1 tsp kosher salt
2 tsp sugar
3/4 tsp freshly ground pepper
8 TBS (1 stick) cold unsalted butter, cut into small pieces, plus 2 TBS melted butter
3/4 C Extra-sharp cheddar cheese, shredded
1/4 C Parmigiano-Reggiano cheese, grated
1 C  Buttermilk

Pre-heat oven to 425 degrees

Cook the bacon till crisp then tear into pea sized pieces and set aside. Pour 1-2 TBS of bacon grease into a biscuit baking pan and set aside.

In a large mixing bowl whisk together the flour, baking powder, salt, sugar and pepper. Cut in the cold butter until pea size crumbs form. A pastry blender would be perfect but I didn't have that so I used a potato masher for a minute or two. Then use your fingers to pinch the crumbs with the butter till it's fully incorporated. 

Stir in the bacon, cheddar and parmesan cheese. Slowly stir in the buttermilk until the dough just comes together. (NOTE: I didn't have buttermilk so I made some by adding 1 TBS of white vinegar to 1 cup of skim milk and letting it sit for 5+ minutes.)

Transfer the dough to a floured surface and gently need the dough by folding over, turning and folding over again. You can also use a roller but I prefer a more rustic look. Once dough is ready flatten to about 1/3 inch thickness and cut using a biscuit cutter. I actually use a mini wine glass I received at a wine tasting nearly 10 years ago. Its the perfect size and the base of the glass fits perfectly in my hand.

Lightly roll each biscuits in the bacon grease as you add it to the baking dish. If you run out of grease baste the remaining biscuits with the melted butter. I only had to use a little bit of the butter for the last two biscuits.

Bake for 25 minutes and let cool for a few minutes before serving with butter, naturally! 

Note: I mentioned to Mr. O that I thought the biscuits were a little dense and heavy to which he reminded me they had both bacon AND cheese. *rolling my eyes* Thanks a lot Captain Obvious! So my thought is next time I make a mini version using a 1 in. or 1 1/2 in. cutter. Of course to accomplish this I'll need to purchase actual biscuit cutters.  Oh well, lookey here... Williams Sonoma has a set of five for $16. I wonder what else I'll find that we "need."


Happy Baking!


Cheers, 
Ouiser

Thursday, October 7, 2010

Recipe of the Week ~ Bob Armstrong Dip with a side of Mommy Guilt

Buenos Dias Yall!

I'm practicing my Spanish as I pack. Is that enough of a tease to make you ask where I'm going?

Mr. O is sending me to Puerto Rico for FOUR days with my girlfriends and I leave first thing tomorrow morning. I plan to spend my time drinking slushy cocktails that make you giggle when ordering one from the cabana boy, reading countless books who've been waiting patiently in my kindle for months and of course spend a few blissful hours at their spa. Le Sigh. 

All in all I am excited beyond belief but I'd be lying if I wasn't a teensy weensy bit uneasy. This will the the first time I've left the boys for so long and only the second time I've ever left Baby Deux over night.

I know it will be a good experience for me as well as for Mr. O but I am hoping to skype while I'm away. I mean what if Baby Deux picks this weekend to start walking? Sigh... okay I don't like where this post is heading. So lets get back to food shall we? 

Anyone from Texas can probably make this dip without even going to the grocery store because we are hard wired to have all of the ingredients on hand in case there is a queso emergency. (Yes this can happen) However for those that don't here is my take on a Texas favorite! Trust me when I say you'll love it. I'm also including a link to the REAL Bob Armstrong Dip recipe from Matt's El Rancho in Austin. If you find yourself in Austin please go visit Matt's it's an Austin institution that shouldn't be missed. 

Bob Armstrong Dip 
(the easy peasy way)
serves- never enough

1 large package Velveeta, cubed and melted
1-2 cans Rotel  (I like to mix the mild with the cilantro version though you won't need both cans)
3/4 lbs ground beef
1 tsp each ground cumin, garlic powder, chili powder, salt & pepper
1/2 avocado, chopped

Melt the Velveeta in a large bowl in the microwave. It can cook unevenly so it's good to heat for a minute than stir and continue till all melted. Add rotel and stir. At this point you'll need to reheat for another minute of two. Meanwhile mix spices with ground beef and cook over medium high heat in a large skillet. Once browned and slightly crispy on the edges add to queso. Top with avocado pieces and serve immediately with tortilla chips. 

Enjoy your weekend folks and I'll see you next week!

Ole, 
Ouiser

Tuesday, September 28, 2010

Recipe of the Week ~ Fleur de Sel Caramels

If I haven't mentioned this before let me clear up any misunderstanding.

I. Am. Not. A. Baker.

I love to cook and I've never met a recipe I can't change which is fine when making savory fare but baking or in this case confections making is much more of a science and therefore things need to be exact.

This is when I should be politely albeit patronizingly removed from the kitchen. I prefer to eyeball amounts. And it is not just because I like to play around with recipes it is because I'm lazy. I don't like having to clean any more dishes/utensils than I absolutely need to which means I estimate a dash, a cup or a tablespoon. And if I get a whim I'll add a dash of cumin or a splash of wine and it usually only enhances the dish. Not so in baking...

Nevertheless, the first time I had one of these delicacies from Artisan Confections a local confectioner, I fell in love. So, when I noticed they printed the recipe in an issue of Capitol File magazine I just had to try them for myself. Now, mine aren't pretty (in fact they are down right ugly) and I would do A LOT of things differently the next time I make them but they taste delicious and I think you'll love them too! If you don't care to put in the hours (and I literally mean hours) to make them you can stop by their store in Arlington (directions) or order them online here.

Before I get to the recipe I thought I'd share a few pictures of some of their other confections. Can you say YUMMY?


Dark Rum
Raspberry Tea
Malted Milk

Cinnamon Caramel

Now that I have you drooling let me share the recipe! And if you do make these I'd be thrilled if you let me know how yours turn out!

Fleur de Sel Caramels
Makes 75-90 caramels


16 oz. sugar
2 oz. corn syrup
4 oz. water
4 oz. salted butter
16 oz. heavy cream
1 vanilla bean pod (or 2 tsp vanilla extract)
1tsp sea salt
1 1/2 lbs bittersweet chocolate, melted
Fleur de sel for garnish
candy/oil thermometer


Combine sugar, corn syrup and water in a large saucepan and cook over medium heat without stirring until dark brown and just beginning to smoke. This takes about 20 mins but once its begins to look slightly brown it cooks quickly. Do NOT walk away. I burned the first batch.


At this point add the butter, cream vanilla and sea salt. Stir frequently until the temperature reaches 248 degrees.  Pour into a lightly greased pan to set. I used an 8 x 10 inch pan and let them cool in the refrigerator. Cut into squares and dip in the chocolate. Adding fleur de sel for garnish. I found dipping the caramels impossible so thinned it with a 1/2 a stick of butter and poured the chocolate over the caramels and sprinkled with large grain sea salt.

I've added notes that I hope will help. The original recipe is severely lacking helpful tips. Of course this could be due to of the magazine's editors, my lack of confectionary experience or the proprietary right of Artisan Confections!

Cheers, 
Ouiser

PS A couple of things I'd like from Amazon!

Tuesday, May 25, 2010

Recipe of the Week ~ Baked Cheese Grits

** Nervously looks around **


Shhhhh, this week's recipe is top secret! It's from Mamere's kitchen and I don't think she'd be thrilled if I gave it away. However, call it childish rebellion but since she has chosen to toddle off to Italy (Rome and Ovieto) for the next three weeks with out me I figure she'll never know! So, if you know me and Mamere in real life just don't go bragging to her about it anytime soon. That's just plain tacky. 


*Note: Dearest MIL, this doesn't pertain to you since she willingly offered you the recipe!


Mamere has been making these grits for as long as I can remember in this beautiful old blue glass covered baking dish. And just like the old green bowl I used to make Ms. Linda's Thanksgiving rolls, I can't picture these grits without that blue dish. 


My main memory about them (other than the fact that they are delish!) is that they take forever to cool after baking. So, being the petulant child I was I would always wait till my mother left the kitchen and then I'd run my finger around the edge of the grits while they were still cooling. Now they were super hot and I would inevitably burn my finger and my tongue BUT it was worth it! And because they hadn't set yet the grits would re-settle and Mamere was never the wiser. Or so I'm guessing. The older I get I'm learning that she was more aware of my mischievous behavior than I was aware of at the time. And I'm not just talking grits. I guess mother's always know!


I hope that you make these sometime for your family and that you enjoy them as much as I did and do!


Baked Cheese Grits
Serves 10 as a side dish
Bake for 45 mins in a 350 degree oven

5 C Boiling Water
1 tsp Salt
2/3 C uncooked quick cooking white grits
1 15 1/2 oz Can yellow hominy
1/2 C Butter or margarine
2 C Shredded Sharp Cheddar cheese
1/2 C grated Parmesan cheese

Stir grits into boiling water and add salt. Return to a boil. Reduce heat and cook for 4-5 mins stirring occasionally.

Stir in hominy, butter and cheese. Spoon into a lightly greased baking dish (13x9x2). Sprinkle with parmesan cheese. Bake for 45 mins or until set. It will need to cool for at least 15-30 mins before serving.


Happy Baking!


Cheers, 
Ouiser

Thursday, April 22, 2010

Recipe of the Week ~ Potato Gnocchi with Duck Ragu

So I was chatting recently with one of my twi-online-fanfic-lady friends, lets call her "Miss Betty"


DH: **cue eye roll (again) and shakes head** 
Ouiser: You know mamere says your eyes can get stuck like that. ugh, please ignore him...


So my "friend" Miss Betty shared a fabulous recipe with me for Pasta with Fast Sausage Ragu. It sounds DELISH and I can't wait to make it myself, one of these days very soon! Thanks doll, not only are you one of the most fantastic writers I know, you also keep me busy in the kitchen. Many hugs and kisses! 


Well, her email got me thinking about Valentines Day 2008, when DH made an unbelievable dinner ~ Potato Gnocchi with Duck Ragu. The rich and intense flavor of the ragu is out of this world. And it just doesn't get any better than homemade fluffy melt-in-your-mouth gnocchi. 


I thought I'd share the recipe with you today. It comes from Chef Fabio Trabocchi's cookbook, Cucina of Le Marche. Chef Trabocchi grew up in the Le Marche region of Italy and was the Executive chef at Maestro in the Ritz Carlton in McLean. (That's just outside of DC for you out-of-towners.) DH took me there for an amazing birthday dinner in '06. 


*note: Rumor has it he may be returning to DC! My fingers are crossed but you can click here to read the thread or just go to www.donrockwell.com.


Click here to purchase this incredible cookbook. There are a number of amazing dishes I've made and even more that I still need to. 


Anywho, this is a fabulous, rich, decadent and somewhat complex recipe but well worth the effort!!! I suggest making it during the weekend or for a special occasion. And if you do make it please be sure and let me know. You know I LOVE hearing from you! Actually, lets make things interesting. If you leave a comment I'll send you Miss Betty's recipe as well. See it's a two-fer!! How can you say no to that???


**cracks fingers** okay, here goes peeps, this is going to be long. 


Potato Gnocchi with Duck Ragu
Serves 6


Gnocchi
2 1/4 lbs  Russet potaotes, scrubbed clean
3/4 C        All purpose flour
1/4 C         Parmigiano-Reggiano, grated
1/4 tsp      Nutmeg, grated
1 tsp          Kosher salt
3 large      Egg yolks


Duck Ragu
1/2 C         Porcini mushrooms, dried
1                 4 1/2 lbs Duck, cut into 12 pieces: thighs, drumsticks, wings, breasts (each cut into 3 pieces) *don't be afraid to ask your butcher to do this for you!
3 TBS        Extra Virgin Olive Oil
1/4 lbs      Pancetta, 1/4 inch dice
3/4 C         of each: Carrots and Onions, diced
1/2 C          Celery, diced
4 C             Dry red wine, such as Montepulciano or Zinfandel
2 1/4 C      Basic Tomato Sauce
1 Sprig       of each: Rosemary, Thyme, Sage, Bay leave
3                 Whole Cloves
Kosher Salt & Freshly ground black pepper
1/2 C          Parmigiano-Reggiano, grated


For the Gnocchi:
Cook potatoes in simmering water for 45 mins or until they are soft. Drain, let cool then peel potatoes and run through a rice mill or potato ricer and spread evenly on counter (or pastry board). Sprinkle with flour, Parmigiano, nutmeg & salt. Add the egg yolks in the center and mix with your hands.  Knead mixture until dough forms. Do NOT overwork the dough! Cover with damp kitchen towel and let rest for 30 mins.


Dust baking sheet and work station with flour. Pull off small section of dough and roll in the palm of your hand until forming a long narrow cylinder about 3/4 in. in diameter. Cut dough into 1/2 in. pieces. Gently push down with the back of a fork to mark with ridges. Once all the gnocchi is made, cover with kitchen towel and refrigerate for up to 6 hours. 


For the Duck Ragu: 
Soak dried porcinis in a small bowl with warm water for 20 mins. Remove mushrooms, squeeze dry and chop.


Season the duck with salt & pepper. Then working in small batches sear pieces on all sides over medium-high heat and 2 TBS olive oil. Set aside. Drain any excess fat and return pan to heat, add 1 TBS olive oil and pancetta. Cook till crisp, then add carrots, onion and celery and cook till soft and translucent. Add wine and raise hit to a simmer. Cook for 10-12 mins or till liquid has reduced by two-thirds. Stir in porcini and tomato sauce into the pancetta mixture. Add duck, nestling it into the sauce. 


Make a bouquet garni by tying the rosemary, sage, thyme and bay leaf together with kitchen twine. Tie the cloves in a small piece of cheesecloth. Add both to sauce. Cover pan and let simmer over low heat for 2 hours, stirring occasionally. When the duck is falling off the bone remove pieces from the sauce. Discard the bouquet garni & cloves. Once cool to the touch, remove the duck skin and pull meat off the bone and return to sauce. Adjust seasoning if necessary. 


When ready to serve, bring a large pot of salted water to a rolling boil. Add gnocchi to the water. When they float to the surface, taste one to see if cooked through. Remove cooked gnocchi with a slotted spoon and gently fold into the duck ragu sauce. Again adjust season as needed. 


Spoon the gnocchi and ragu into warm bowls and top with grated Parmigiano. 


Happy Cooking! I'm drooling from just typing this recipe! I am definitely making this soon!

Cheers, 
Ouiser

Thursday, April 1, 2010

Recipe of the Week ~ Bunny Bread

No April Fools Jokes here my friends. It really has more to do with the fact that I'm the absolute worst at pranks. The few times I've attempted they are either A) not funny or B) not funny. Take your pick. Plus I'm ridiculously gullible so I in turn fall for every last one of them.

Sure, I can dish out a sardonic quip here or there but gut wrenching shocks and belly laughing surprises are not my expertise. Instead I'm giving you one of my most favorite recipes that is tied to some of my most favorite memories.

Like most major holidays, I grew up spending it with family. In my case "family" included my godparents, who incidentally also happened to be my parents' best friends. Easter was no exception.

I have very fond memories of my Godsister (what? yes it's a real term) making her famous deviled eggs  several of which always came out tinted a light pink from the the dye seeping in. And then there is the official bread of Easter... no I'm not getting all religious on you and discussing mana or the body of Christ....

No, I'm talking about Bunny Bread, natch.

I don't remember what year it was first printed in the Houston Chronicle but I'd say it was sometime in the mid-80's. My godmother clipped the recipe and we've been making it every year since then. In fact one year DH and I spent the holiday with his oldest sister and her family and they were kind enough to make it with me that year. Now, I'm pretty certain it's a tradition of their own!

This is not only fun and easy to make with kids, it's also really really tasty! And not to get all schmaltzy on you but I hope you'll try making it with your family. We most certainly will be.

I'm thinking I just might let the baby boy help roll out the dough. I mean why bother cooking if you can't get some flour on the floor every once in awhile!

tee hee hee note: I just pulled out the recipe card to type it out here when I noticed that next to the title: Bunny Bread, Mamere wrote "Easter" in parenthesis. Really Mamere? Did you think I was going to get confused and serve Bunny Bread on President's Day? You are too cute. 

Bunny Bread
Makes 1 large bunny

5 1/2 C All-purpose flour
2 C       Carrots, grated
3/4 C    Walnuts
2 TBS   Sugar
1/2 tsp   Salt
2 pkg.   Rapid Rise Yeast
1 C       Water
2/3 C    Milk
3 TBS  Butter
1           Egg
Raisin for bunny eyes and whiskers

Pre-heat oven to 400 degrees. Set aside 1 cup of flour in a large bowl. Mix remaining flour, carrots, walnuts, sugar, salt and yeast in a large bowl.

In a saucepan over low heat cook water, milk and butter until hot to touch. Stir into dry ingredients and Mix in only enough of the reserved flour to make dough soft.

On a lightly floured surface knead dough until elastic (8-10  mins). Cover and let rest for 10 mins in a warm place.

Okay, I've read mamere's directions for making the bunny a few times and even I think they are confusing so here's my attempt....

Divide the dough appropriately to make the body, paws and ears on a greased baking sheet. Then add raisins for the eyes and whiskers. Cover loosely with towel and place baking sheet with covered bunny over a bowl of hot water for 20 mins.

Brush all over with a beaten egg and bake for 25-30 minutes. Let rest before tearing at the limbs. :)


This is basically what it should look like.... although ours have smaller paws and ears than this one. Not sure but am thinking he had one too many salted margaritas last night, perhaps that caused all the swelling in the paws.

Cheers,
Ouiser

Wednesday, March 24, 2010

Recipe/Cocktail of the Week ~ Margaritas


I'm not going to lie, I debated about whether I wanted to share today's recipe with you. Everyone always raves about these and I'll be frank, it has kinda been my "thing" for years.

But, what can I say? I'm just that kind of person ~ kind, giving, always thinking of others ~ you know, basically like Mother Theresa with better clothes. 

Here in DC, Ms. Spring seems to have awoken and is peaking out from under her duvet. I for one am eagerly awaiting her annual arrival. Cherry blossoms, farmers markets, long long walks in the neighborhood and dining al fresco.

Which brings me to today's post. I absolutely adore cocktailing in the out of doors. Lets be clear, I'm not "outdoorsy" but if given a nice table and chairs on a stable surface I can stay outside for hours sipping away. 

I wish I could credit the right person for this recipe but frankly I've been making them since college... and if I were being totally honest maybe even high school so I have no idea where I got it. Never the less they are simple and delicious! I for one am NOT a fan of margarita mix, it always taste so syrupy. If you feel the same, please don't be scared by the limeade, I swear it has a nice clean crisp flavor. 

We've got another busy weekend but I feel confident that when push comes to shove I can make time for some quality backyard bonding with one of these in my hands.

Ouiser's Margaritas
Makes 4 servings

2 8 oz. cans of Minute Maid frozen limeade
1 bottle Corona beer
4-5 oz. Tequila (or more -- no judging from me) 
limes & kosher salt

Mix first three ingredients in pitcher until limeade has completely dissolved. Add ice to glasses before pouring and a slice of lime to each glass makes it perfect.

Notes: ~  I've tried any number of mexican beers with this recipe and Corona is by far the best! But by all means experiment till you find your favorite.

~ Maybe I'm getting old and persnickety but it's worth it to buy decent tequila. Yes, peeps it does make a difference. 

~ For those that like salted margaritas (that'd be me) just rub a little lime juice around the rim of the glass and dip in kosher salt before pouring. I've found that pouring kosher salt on a small appetizer plate is perfect for this little task. 

Happy Cocktailing!

Cheers, 
Ouiser 

Wednesday, March 10, 2010

Recipe of the Week ~ Tiramisu

Today's (okay okay tonight's) recipe comes from one very talented lady. Both a writer of Twi-fiction as well as a gourmand, clearly she's my role-model! And isn't it great when I can combine two of my favorite things... cooking and twilight?

Now I think we all know that I lurv most sweets but I've never been a big fan of tiramisu. Not sure why, perhaps because when I'm actually in an Italian restaurant I usually gorge myself with the pasta so that I can't even dream of having dessert.

I'm still pretty much making a dessert a week as I did when I was pregnant (note I now have a 4 month old... sigh...) and for some reason haven't exactly kicked the habit yet. So when I noticed that the multi-talented Ms. Ninapolitani (yep, she's Italian) posted her tiramisu recipe I decide to try it..... Oh and check out her recipe blog, it's very witty! Click here.

It was AWESOME... like ~ lick the bowl, beaters, spatula and yes the few spills on the counter ~ kinda good. And warning, it very rich so a little goes a long way but we are still snacking on the one I made on Monday afternoon. What? I know it's only Wednesday but I'm at home ALL day people, you can't expect something this good to stick around very long. Did I mention it has Frangelico in it? Y-U-M-M-Y! A few years ago I went through a big coffee and frangelco phase were I ordered it after every meal. I think DH was happy to see me get past that one.


Step one... Mix eggs & sugar in double boiler, which (along with our cookware set) is courtesy of the hosts of our engagement party. Thanks guys!! This is like the 4th time I've used the double boiler in 6 years. 


Step Two... fold in whipped cream into sugar mixture and pour yourself a cup of coffee... 


Step Three ... You're almost there so why not add a little Kaluha to your coffee? mmm, yummy! 


Step Four... Let the finished product chill for 8 hours in the fridge... or just dig into it with a spoon cause its really that good!


Below is Nina's recipe. I hope you'll try it and let me know what you think!

PS. If you're thinking to yourself that it looks a lot like a trifle it's cause it does. I didn't have a pretty tiramisu dish... trust me it tastes just the same people.

Cheers, 
Ouiser


[Recipe+Card.png]


Wednesday, March 3, 2010

RecipeS of the Week ~ BEST Burgers EVER & Yummy Baked Chocolate Pudding

As you may recall from reading this, I promised LeCoeur (yes I talk to my blog... it's not weird... and don't tell me if it is) that I'd post two over the top fabulous, delicious recipes this week to make up for my utter failure to post much of anything last week. 


So, Happy RecipeS Wednesday!


I mentioned today's first recipe way back here. It comes from Bon Appetite and my wonderful MIL (who puts Martha Stewart to shame) made it during one of our summertime Texas visits years ago. Ahh, sitting by the pool sipping a cool cocktail. It's nice visiting the in-laws. but I digress....


DH immediately fell in love and asked that I get the recipe. Unless I'm making turkey burgers (cause seriously sometimes you need to eat healthy) I always make this version for a good juicy deliciously indulgent burger. 


Andouille & Beef Burgers with Caramelized Onions, Blue Cheese & Spicy Mayo
Serves 6


Spicy Mayo: Mix together and let chill about an hour before serving.
1/2 C Mayo (I love Hellman's light)
2 TBS Lime Juice 
1TBS Hot Sauce (Tx Pete rocks!) 
1 tsp Cayenne Chili Powder
1 tsp Cumin
Note: This is actually my own version of the sauce


Burgers: Mix together then form burgers. Season and let rest about 15 mins before grilling
1/2 lbs Andouille Sausage, cut into 1/4 in. cubes
3/4 C pecans, toasted and chopped (best pecans ever can be ordered here)
1 1/2 lbs Ground Beef, chuck (80/20 is recommended but I usually go leaner)
Salt and Pepper


Onions: Heat oil then cook onions over low heat till caramelized (about 30-40 mins)
3 large Vidalia Onions, sliced thin (mandelin does the job well)
2 TBS Olive Oil


about 5 mins before serving toast hamburger buns then construct burger with spicy mayo, onions and don't forget the crumbled blue cheese! You'll need about 1/4 lbs but more if you like (which I do!) 


And I can't remember if I mentioned this in a previous post but DH gave me Ina Garten's latest cookbook for Valentines Day. I'm always a sucker for Ina, but you already knew that. Okay so EVERY recipe looks divine but I had a request from DFIL to make this particular dessert after our birthday dinner celebrating DMIL's birthday. All I can say is kudos to you DFIL, this was rich, decadent, fork and finger licking good. I'll warn you though, it's ridiculously rich. It really must be served with ice cream to help cut through the richness. I went with Vanilla Custard from the Dairy Godmother, natch. 


Oh and the recipe calls for one large baking dish, but next time I might try making it in individual ramkins for a cute alternate like in this photo.


Baked Chocolate Pudding
Serves 6


1/2 lbs Unsalted butter (2 sticks), plus extra to butter dish
4 Extra large eggs (I used large)
2 C Sugar
3/4 C Good cocoa powder (I used Giradelli)
1/2 C All-purpose flour
seeds scraped from 1 Vanilla bean (I used 2 tsp of vanilla extract instead)
1 TBS famboise liqueur (optional: I didn't have framboise-- a raspberry liqueur, so I substituted 2 TBS of Kahlua)
Vanilla ice cream, for serving


Pre-heat oven to 325 degrees and butter a 2 qrt baking dish. 


Melt butter and set aside. In a large bowl beat the eggs and sugar on medium-high for 5-10 minutes and until mixture is very think and a pale yellow. Next, sift the cocoa powder and flour together and set aside.


When egg-sugar mix is ready, lower speed to low and add vanilla, liqueur (if using) and the cocoa-flour mix. Mix until combined, then add the cooled butter, slowly until just combined.


Pour mixture into the prepared dish and place on a larger baking pan (I used my lasagna pan). Add enough very hot water so that it comes half way up the sides of the baking dish. Bake for exactly one hour. The center will appear very under-baked but that's good, it should  be between a brownie and a pudding. 


Allow to cool and serve with vanilla ice cream.


**Chef's note: Ina's recipe calls to make this in your standing mixer. Well mine is in a box out back in our storage shed so instead I made this with my hand mixer and I think it turned out just dandy!


I know these seem like two random recipes but they are two of my favorites (one old and one new) plus they are both over-the-top decadent, so there I found a common theme. Yay me!


Happy Noshing!


Cheers, 
Ousier

Wednesday, February 17, 2010

Recipe of the Week ~ Banana Cream Pie & Vampire Excuses

Okay yeah, ummm I wasn't even sure if I should acknowledge the fact that I haven't blogged since Sunday, but let's be honest it's me and I can't help but over share.

So here's the deal... when I get sucked into a book (or in this case a series) I loose all ability to do much else but read. And yes, I've gotten sucked into ANOTHER vampire book series. I know I know, I swore to myself that I wasn't a "vampire" kinda girl and that Twilight was a one time thing. Well apparently after reading four, yes FOUR vampire series over the last seven months I'm finally admitting what DH has teased me about for months... I. Like. Vampire. Books. **drops head and sighs** 


Just a quick plug for the current book series, Morganville Vampire Series by Rachele Caine. The plot revolves around Claire Danvers, a brilliant sixteen year old college freshman at Texas Prairie University in Morganville who literally stumbles into serious trouble with every turn in this mysterious vampire ruled town. Luckily she finds refuge, friendship and first love in a house with three town rebels. This isn't as ummm, shall I say "risque" as the Southern Vampire Series but its action packed with a great story line and the romance is young and very sweet. There are seven books in the series (with the eighth coming out early this year) and I'm about to finish the second book later tonight. Thank goodness for my kindle! When I finished book 1 last night around midnight instead of responsibly going to bed I was able to feed my addition by ordering book 2 and starting it within 60 seconds. Gaaahhh how I love my kindle. Click here for more kindle lovin'.

Okay believe it or not today's post is in fact about food. In this case the BEST EVER Banana Creme Pie.  Early on in my relationship with DH I learned about his love of Banana Creme Pie so after several easy bake jello pudding pies complete with pre-made graham cracker crusts I decided it was time to "stretch my legs" so to speak. This recipe sounded complicated to me at first but having made it a number of times over the last few year it's become much easier. And since DH made a scrumptious Valentines Day dinner for me (Chinese Cashew Chicken!) I made this for dessert.

Recipe Credit: This came to me via Bon Appetite magazine from their RSVP section, which (if you aren't familiar with) is where they print recipes from restaurants that readers have requested. In this case it's from Memphis, Tennessee restaurant, McEwen's on Monroe. 

If you make this, please let me know what you think! I crave comments and am not afraid to ask for them!!

Banana Creme Pie
Crust
2 1/2 C    Graham Cracker crumbs (about 2 packages of crackers)
1/3 C       Sugar
1/4 C       Bananas, mashed
1/4 C       (1/2 stick) Unsalted Butter, melted


Filling
1/2 C      Sugar
1/3 C      Corn Starch
1/3 tsp    Salt
1 1/2 C   Whipping Cream
1 1/2 C   Whole Milk
3 large    Egg yolks
3 tsp       Vanilla (recipe calls for vanilla bean & extract but here I just increased the extract)
2            Ripe Bananas, peeled, cut in half and then cut into 1/4 inch slices.


For Crust: 
Preheat oven 350 degrees. Stir graham cracker crumbs, sugar & mashed bananas. Add melted butter and stir before pressing onto the bottom and up the sides of a 10-in glass pie dish. Bake crust 15 mins then cool completely before adding filling.


For Filling: 
Whisk sugar, cornstarch and salt in a large sauce pot. Whisk in whipping cream, whole milk, egg yolks and vanilla extract. Whisk over medium heat until custard thickens and boils (about 5 mins). Let custard cool completely, about an hour. 


Stir custard to loosen. Spread 1 Cup of custard on bottom of pie crust then top with a half of sliced bananas. Repeat layering with remaining custard and followed by banana slices. Chill pie until filling sets and crust softens slightly, at least 8 hours and up to one day. Add a layer of banana slices on top before serving. I also make homemade whip cream with a little sugar and vanilla extract to top of the pie.

Happy Baking!

Cheers, 
Ouiser